How to Adopt .Net Aspire
Sunday, 08 June 2025
Adopting new technology in a running project can be an "interesting” experience, there’s often a fear of disruption, complexity, and long onboarding times. But with .NET Aspire, the journey doesn't have to be intimidating. One of the greatest strengths of Aspire is how easy it is to introduce gradually. You don’t have to refactor your entire architecture or change your whole deployment strategy from day one.
Instead, Aspire is designed to support incremental adoption. You can start small by improving your local developer experience, then slowly bring in service discovery and eventually consider deployment integration. In this blog, I’ll go over the steps I take to adopt Aspire, so you can experience the benefits without the overwhelm of a big bang migration.
Let’s dive in!
1. Level Up Your Local Developer Experience 🚀
In my opinion, the biggest bang for your buck when adopting Aspire is in the local developer experience. This greatly improves the onboarding process for new team members and gives us a powerful, unified way to model our application locally.
Instead of piecing together scripts and configuration files across different systems, Aspire lets you define and manage your environment in one place. Not only does this streamline development, but it also provides valuable observability into what’s running and how the components of your application interact. It’s a big win with relatively low effort and immediate payoff.
Audit Your Configuration
This discovery process is crucial when adopting Aspire. Understanding your existing configuration helps you decide what belongs in secrets, what should be modelled as parameters, and what can be safely defaulted. It also ensures that you don't miss any hidden dependencies that might cause issues down the line. By mapping it all out first, you’ll be in a much better position to migrate configuration into Aspire’s structure in a controlled and confident way.
- List out all the services and resources your application uses locally: databases, message queues, third-party APIs, local services, etc.
Add our AppHost and start Modelling in Aspire
Once you've audited your configuration, the next step is to create your Aspire AppHost project. This project serves as the orchestrator for your distributed application. It wires together all your services, databases, and infrastructure resources. You’ll also want to create a ServiceDefaults project to centralise common configuration, like logging, service discovery, metrics, and diagnostics, this works for your .NET applications.
First, install the Aspire CLI and ensure you have the latest .NET SDK. The Aspire CLI is great for running and managing your distributed application locally. It gives you powerful commands for running, visualising, and debugging your application and dependencies from a single entry point. See my Getting Started with Aspire blog for how to get set up with Aspire.
Once you're set up, start defining your resources in the AppHost project. You can model web apps, APIs, databases, message queues, and almost any other infrastructure components. These are expressed in a clear, type-safe syntax using .NET code. This gives us a clear picture of our platform and all the interconnected services. This will likely take a while to get going but it’s worth it in the long run. You don’t have to model everything straight away either, you can slowly adopt it for key resources first if that’s easier.
Microsoft and the community provide a lot of Aspire Hosting integrations out of the box, checkout the MS Learn site here for more: Hosting Integrations. These integrations are how we model our application, they’re also used by the publishing and deployment later on if we chose to go that far.
Also make sure to add the ServiceDefaults to your .Net projects as this will give you the basic observability and tracing for the dashboard. Once you’ve added the reference you can then add these 2 lines to your Program.cs file to wire it all up:
// Add service defaults & Aspire client integrations.
builder.AddServiceDefaults();

// ... Cut for brevity ...

// Map service defaults
app.MapDefaultEndpoints();
If you’re not ready for these to be in your production environment you can wrap these in an environment variable like “UseAspire” and have the AppHost set that to true.
Adding Configuration
Now we have our AppHost we need to add in all the configuration we discovered earlier. The easiest way to do this is using Aspire Parameter support. This way you can use things like .Net User Secrets for any secrets and the AppHost’s appsettings.json file for anything that’s not secret. Here is an example of adding a secret to our model:
var jwtKey = builder.AddParameter("jwt-key", true);
It will look like this in our UserSecrets:
{
  "Parameters:jwt-key": "jslkjasdlkjqo2134el12kj3lksqjlaskjdl"
}
Note: You need to add start them with “Parameters:”, so that Aspire knows they’re used for Params.
For any non-secrets you can add them to the Parameters section of the AppHost appsettings.json file:
{
  "Parameters": {
    "UseCache": "true"
  }
}
You can reference these in the same way:
var useCache = builder.AddParameter("use-cache");
You can also use things like KeyVault and AppConfiguration store if you already have these setup. I won’t cover that here, but it works in a similar way to how you would add these to any other .Net application.
So how do we use these now we’ve got them? This is where environment variables come into play. You can use these to pass in the configuration to your applications. By using this feature we don’t have to worry about changing our applications to use the Aspire Client Integrations until we’re ready to do that refactoring.
var api = builder.AddProject<Projects.AspireChat_Api>("api")
    .WithEnvironment("JWT_KEY", jwtKey)
    .WithEnvironment("USE_CACHE", useCache);
One of the other great features is that Aspire manages ports for you. So you can also bin any scripts that were used to make everything talk to each other. Instead you can now get Aspire to model that and wire it up for you, again using the environment variables:
var web = builder.AddProject<Projects.AspireChat_Web>("web")
    .WithExternalHttpEndpoints()
    .WithEnvironment("USE_CACHE", useCache)
    .WithEnvironment("ConnectionStrings__DefaultConnection", database)
    .WithEnvironment("API_BASE_URL", api.GetEndpoint("https")).WaitFor(api);
As you can see with this example we’re setting the API_BASE_URL with the endpoint for the api and Aspire will wire that up automatically. I’ve also set the database connection string here as well using Aspire to set it all up for us.
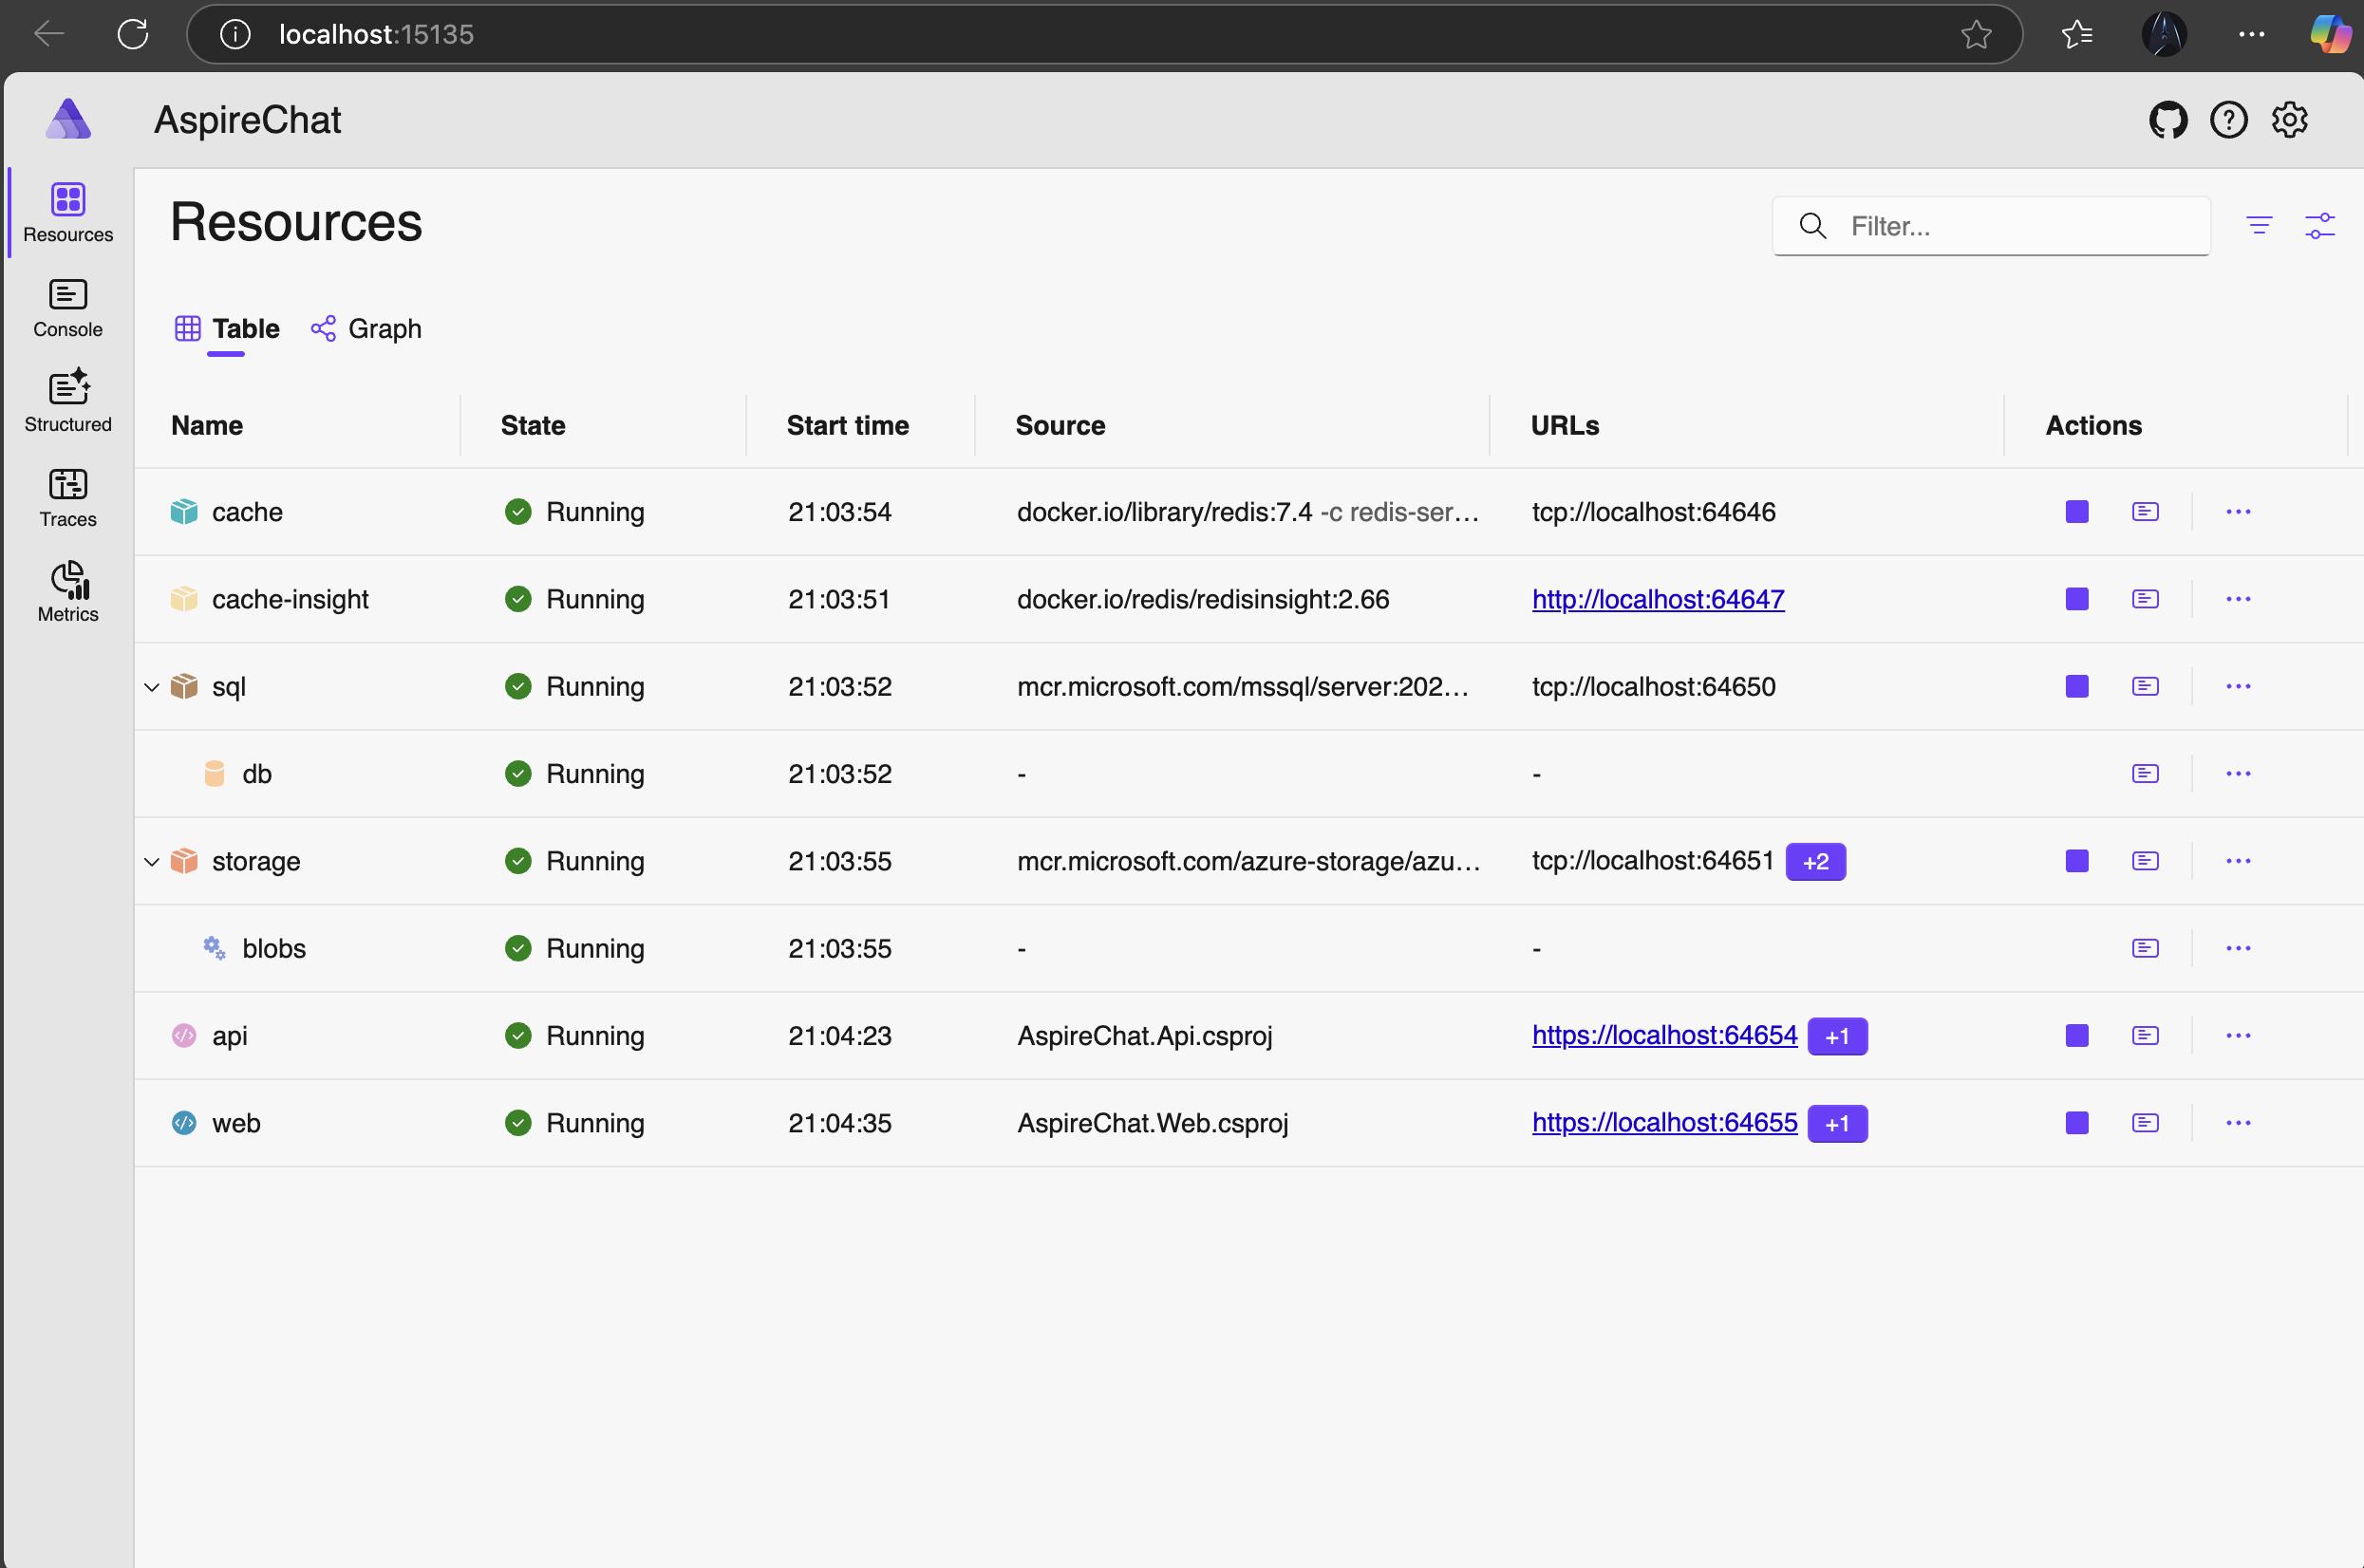
Now that you’ve got all of your configuration setup and your app modelled you can run the AppHost and you should see the lovely Aspire Dashboard and be able to run your application with some observability (depending on your setup):
2. Embrace Service Discovery and Aspire Packages 🔎
Now that you’ve got your application running locally and wired up with environment variables, it’s a great time to look at adopting the Aspire Client Integrations. These are curated packages provided by Microsoft and the community that plug into your applications with minimal setup and maximum benefit.
The Client Integrations follow best practices and bring in features like observability, resiliency, diagnostics, configuration, and telemetry, all designed with the Aspire dashboard and ecosystem in mind. Adopting these packages means you can begin capturing valuable insights, structured logging, and distributed tracing, without rewriting large parts of your code. It’s a medium-effort, high-impact improvement that integrates smoothly with the Aspire service discovery model and helps future-proof your application.
Adopt Aspire Client Integrations
If you're wondering which client integrations are available or supported, Microsoft maintains a list of officially curated Aspire packages that cover a wide range of services. These include integrations for EF Core, Redis, Postgres, and more. It's worth reviewing the Microsoft Aspire Client Integrations documentation to see what’s available and what fits your stack. Remember if it’s not here that’s ok, you can continue to use what you’ve already got setup.
Let’s look at an example. Say you’re using EF Core, we can do a small change to the codebase and begin using the Aspire Client integration instead and it will add in proper tracing down to the database, resiliency so it retries safely, health checks so we know our database is doing ok and much more.
First we need to add the new EF Core package:
dotnet add package Aspire.Microsoft.EntityFrameworkCore.SqlServer
Then we can switch out our setup of EFCore to use the new client integration:
builder.AddSqlServerDbContext<AppDbContext>(connectionName: "database");
ConnectionName should match the name you gave the database in your AppHost. This will add the DbContext to your DI using sensible defaults. You can completely customise these just as you’d expect if you was adding the DbContext in the traditional manner.
If you’re doing something more complicated with your setup of EFCore and you don't want to change that part of your code, you can still benefit from the client integrations by enriching your db contexts instead. This will still give you all the Aspire goodness:
builder.EnrichSqlServerDbContext<AppDbContext>(
    configureSettings: settings =>
    {
        settings.DisableRetry = false;
        settings.CommandTimeout = 30; // seconds
    });
There are lots of client integrations available and more are being made by the community. These are completely optional and you don’t have to use them, but if you can they do offer some great advantages.
3. Optional: Adopting Aspire for Deployment 🌐
With your local environment and service discovery sorted, you can optionally let Aspire handle deployment orchestration, either locally, in test, or for production. I say 'optionally’ because this part of Aspire is still under heavy development and will likely change a lot as Aspire continues to evolve. The deployment tooling and integrations are evolving rapidly, and you’ll see significant changes with each release of Aspire.
Currently, Aspire deployment is best suited for simpler setups, such as development environments, internal tools, or small-scale applications. For anything more complex, I would still recommend handling deployment yourself using your existing pipelines or infrastructure-as-code tools. Aspire's deployment capabilities are promising, but for now, it's wise to treat them as an evolving bonus rather than a production-grade solution.
- Aspire supports deploying to Docker, Azure Container Apps, and more with a simple CLI or CI/CD integration.
- Model your deployment topology in Aspire, describe which resources run where, and how they connect.
- You can incrementally adopt this, start with dev/test, then move to production as you gain confidence.
- If you prefer to stick with your existing deployment, you can still get all the local/dev benefits of Aspire!
You can check out my other blogs:
They cover in more detail how to deploy to your host of choice.
Final Thoughts
Adopting Aspire is not an all-or-nothing decision, and that’s one of the things that makes it so approachable. You can begin small, focusing just on local development, and still see huge benefits. In fact, I’d argue that even if you stop there, the improvements to your developer experience and onboarding process are more than worth the effort.
Aspire makes it incredibly easy to get started. The tooling, integrations, and dashboard give your team a clearer picture of your system with far less configuration and hassle. From spinning up services to managing environment variables and secrets, it streamlines many of the pain points developers typically face.
As Aspire continues to evolve, it’s only going to get better. The team is moving quickly and the community is growing, which means new features, integrations, and improvements are arriving all the time. So even if you don’t adopt everything today, keep checking back. You may find that what seemed out of reach before is now just a few lines of code away.
Give Aspire a try and see how far you can get with just a few simple steps. Your team, and future self, will thank you.
Let’s build something great together 🚀
Comments (0)
No comments yet. Be the first to comment.
Subscribe so you don't miss out 🚀
Be the first to know about new blog posts, news, and more. Delivered straight to your inbox 📨